| Home(Japanese) | Home | Introduction | How to sewing. | Paper pattern download | ||||
Usako's sewing studio. > How to sewing. > How to make kariginu
Translate
It is easy to make for beginners! Almost you only sew straight and complete the outfit!
|
||
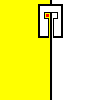 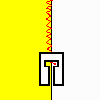 |
1)That is a
method of zig zag sewing for home use. Make edge of cloth comes to center of metal holder. When needle goes down on right side, As to be forced out and sew zig zag. This way a part that being forced out covering edge of cloth and not to get frayed. |
|
| 2) Apply Interfacing Inside the cover and lining side of neck. | ||
| 3) Make string for through the ribbon. | ||
 |
4) Fold a margin to sew up to the other side with iron. | |
 |
5) Sew 2mm from the edge with machine. | |
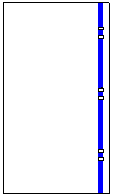 |
6) Fold both side of
edge and sew on the sleeve.
|
|
 |
7) sew edge of sleeve
and deep sleeve together. Below URL: how to sew cuff 1:05~2:42 http://www.youtube.com/watch?v=Iq2ffJWqUs0 |
|
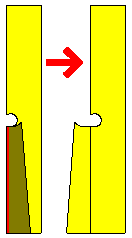 |
8) Sew together center
of front for karii modoki. Suikan modoki doesn't have this process. |
|
  |
9) Front bodice and inside the cover layer on middle front and sew together following red line. | |
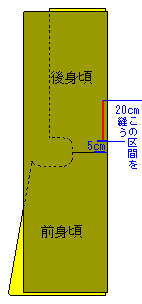 |
|
|
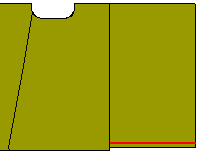 |
12) Sew
bottom of sleeve. This time expand fold.  13) Pull down a margin to sew up
of cuff to inside. 13) Pull down a margin to sew up
of cuff to inside. It should be easy because already iron. |
|
Front Back |
14) Sew
lining same as front material. Layer the lining on front material make it as mid front.
|
|
Front Back |
15) inside
out and sew front of hem and lining together. If you don't mind showing stitch from outside, should be faster with stitch. (it is hard to see the stitch, expect super zoom up photography) sleeve of bodice sew with front and lining together. For original japanese clothing is all hand made, so this is not a original method. For collar place 5mm from the edge. |
|
 |
16) Sew
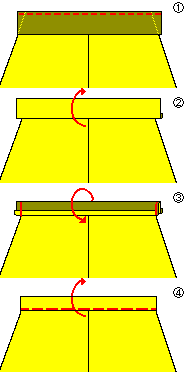
neck. (1) Like on the illustration, sew neck as the cloth folded inside out layer on the bodice. (2) Rase up. (3) Folded inside out where half way, sew right and left side. (4) Refacing and stitch. In case if sew strings etc before (1) sew temporary and sew with neck together. Below URL: how to sew collar http://www.youtube.com/watch?v=3QR24jo10i0 It is different shape, but same method.
|
|
 |
Originally we don't use pattern for
national costume. But we made pattern with sewing base for beginners. It is easy to make for beginners! Almost you only sew straight and complete the outfit! Also, this pattern already has sewing base. the way you are not going to mistake and finished up making smaller. Of course you can use this pattern for Halloween costume , festival and japanese style lolita base etc. You can make many different costume with this pattern. *This is a only top outfit. For bottom, please use [Pattern for hakama] Size Bust 95cm Waist 80cm Height 170cm Can be worn under above size. This paper pattern is download date. You have to install the Zip software(archiver) and an Adobe Readeror. Both software is cost free. |
|
| Explanation
on the pattern. adjusting position of sewing together. make a hall on the conner. |
||
Home(Japanese) | Home | Introduction | Paper pattern download. | How to Sewing video.
Copyright 2001 usako(USAKO). All rights reserved. Never reproduce or republicate without written permission.