|
||||||||
| Home(Japanese) | Home | Introduction | How to sewing. | Paper pattern download | ||||
Usako's sewing studio. > How to
sewing. > How
to make tailored collar jacket.


Translate
![]()
![]()
![]()
![]()
![]()
![]()
![]() ...etc
...etc
   |
1)Put the paper pattern on to the
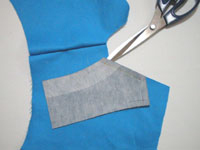
material and mark around it. On you have done this cut along the lines. Fist rough cut material bigger than pattern. Also rough cut interfacing bigger than pattern and smaller than material and stick on the material with iron.
|
  |
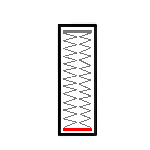
2) That is a method of zig zag sewing for home use. Make edge of cloth comes to center of metal holder. When needle goes down on right side, As to be forced out and sew zig zag. This way a part that being forced out covering edge of cloth and not to get frayed. |
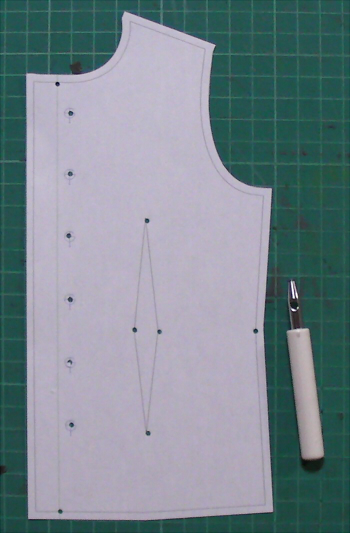 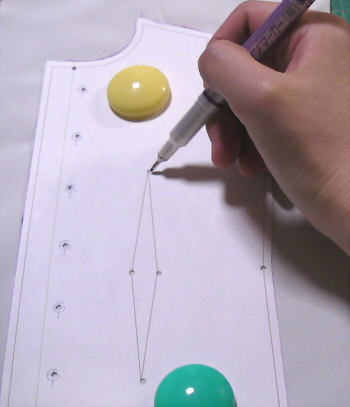 |
3) Make a copy of paper pattern mark. |
 |
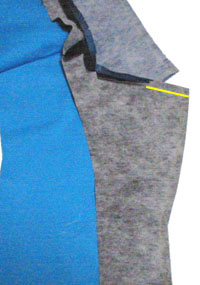
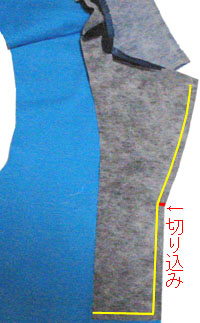
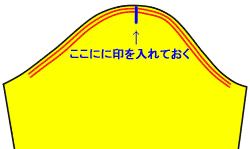
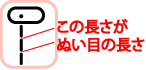
4) Let's make notches for alignment
before sewing it (You put an around 5-8mm cut in a margin for a seam so that the cut is not seen from the right side as to align the position of sleeve and sleeve cap as well.) |
 |
Sew the shoulder. |
 |
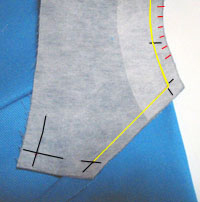
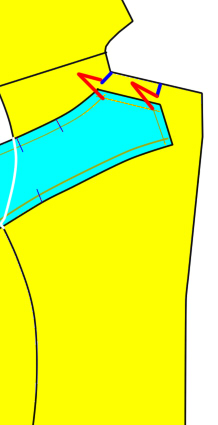
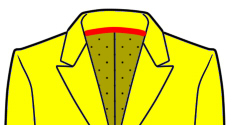
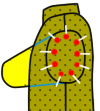
5) Be sure to mark the point of
intersection of the line of the paper pattern of the
neckband, the center back neck and the position to fit
with shoulder line. Click here to see the animation of how to sew tailor collar http://www.youtube.com/watch?v=mo5xZupUUj4&feature=player_embedded |
 |
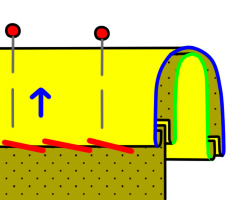
6) Put a mark in a neckband after you
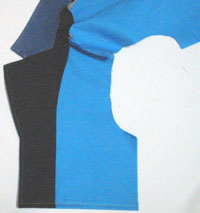
attach interfacing. At neckband coming to the right side, mark to the hole made in the above figure by piling up a paper pattern with disappearing air-soluble marker or the pen which do not stain through the face. At the backside, you can sew neatly if you pull a completion line like a figure to cross to be easy to sew it. ?Facing side becomes top collar (As it comes to the face if you turn it down) Attach the interfacing to backside collar to make collar thick. |
 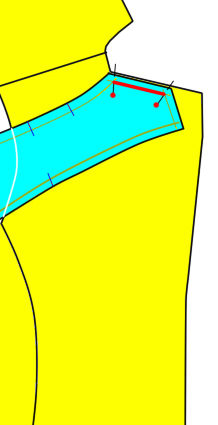 |
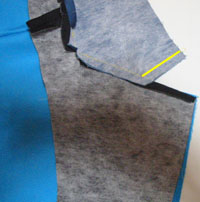
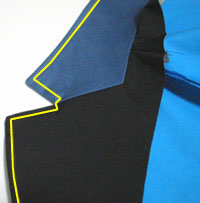
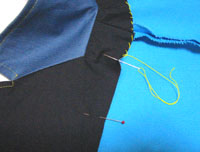
7) Put a notch in the lapel (the part which warped of the chest) of facing and the part of the boundary of the neckband as a mark and stab straight a needle from right above so that the seal of the neckband and the position of the cut of the lapel meet and fix it. At corner of the shoulder side, place a needle at just the point of intersection of the seal of the neckband and a completion of the garment body. |
  |
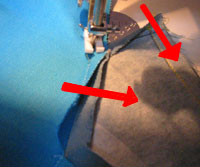
8) Start to sew manually and begin to sew it by setting a sewing machine needle so that a needle just falls into the point of intersection. Around the time to finish sewing, you lose speed with care not to sew too much it or you sew it manually just to the point of intersection. |
 |
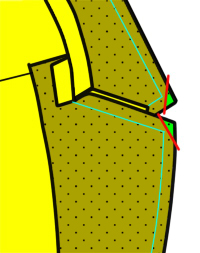
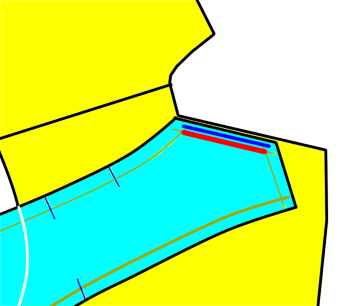
9)Because when you just sew a
neckline, you might draw a neckline if you do nothing, so
you reverse it and make a notch for a feeling to have 1
millimeter leave not to cut a seam at the corner of the
front garmend body. (You do not need to cut the neckband) |
 |
10)To sew the back from the side of
necks You sew it with a big seam manually, and not to slide a place of which 2-3mm more away from a line to close by a sewing machine. |
 |
11) Please sew it so that an angle
matches properly not to slide as much as possible. If seams were piled up or slide from the top, it seems to have been drawn seeing from right side. In addition, if you try to avoid to sew extra cloth, fold cloth, and sew it in a state straight as much as possible, you can sew it neatly.
|
 |
 12)
Divide
the margin to sew up by iron. 12)
Divide
the margin to sew up by iron. |
 |
13) Sew the facing. to the
collar. |
 |
14) Sew the facing to the center front. |
 |
15)Sew the both ends of the collars by piling up, avoiding to sew the margin for a seam of collars. |
 |
16) Sew
the upper side of neckbands. |
 |
17) Sew from the top point of
facing to the border of the collar. and stop to sew it to be united with the line which passed through a neckband first. Please try to avoid a margin for a seam with care not to sew the margin for a seam of the collar then.
|
 |
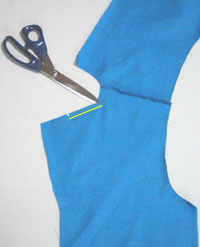
18) Sew the center front.
Cutting off unwanted seam margin. |
 |
19) Fold facing to the under. |
 |
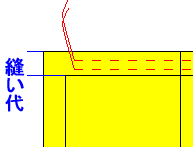
20) Sew the topstitching from the 0.5cm in from the center front of edge. |
 |
21jMake button hole Please read sewing machine of explanatory note. |
  |
22) Sew collars and fold it. Because you turn down half of the collars, the length of a collar seen on the face and a collar hiding in the back become different for the thickness length. Therefore the collar became drawn when you fold the hem of the collar according to paper pattern and put it inside. So, fix a collar with a pin by folding a collar like the completion so as to make a collar line like a natural curve. And if you fold the hem of the collar, put it inward and sew it manually, it is finished neatly. |
 |
23) Hand sew the facing by a blind stitch Because there is a lapel in facing like a collar, you fold it for a moment and put the room for curves and stop a pin so that a wrinkle does not occur. |
 |
24) Sew the side. |
 |
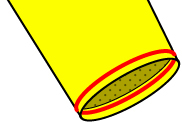
Fold the hem by iron. Fold by 2 centimeters width as a completion line with irons. You may sew it with a sewing machine straight, but you may stitch line by hand. |
 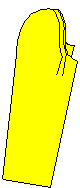 |
25) Sew sleeve. There extra space on the sleeve, reason for make it 3 demential. Make sure squeeze the gather. sew 2lines on the 2~3mm on top and bottom from front of finishing line. "Important" Beginning of sewing and end of it make sure starting from a way over 5cm from the edge and make sure have extra thread. |
 |
26) How to squeeze gather Make longer sew length on the machine. |
 |
27) Turn down the dial for the upper thread. |
 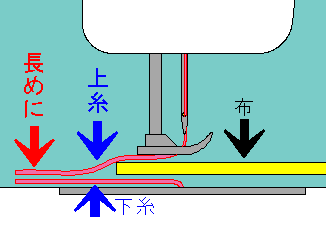 |
28) Start sewing from 1.5cm from the
edge. Sew 2 lines in margin to sew up. Sew 2 lines gatherer better than 1 line. For beginning of sewing , make sure have extra thread after machined. For the end make sure have extra thread and cut. |
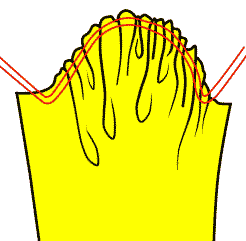 |
29) After sew 2 lines on top and bottom and pull the under thread, it makes gather. |
 |
30) Made to original thread adjustment and sew the side. |
 |
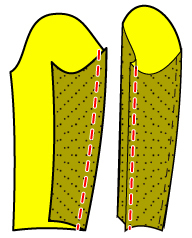
31)
Make a folding line with an iron at the cuffs adjusting
to your sleeve length. Take a stitch by a straight line from the inside. When you do not want to take out a seam, sew it by blind stitch. |
 |
 32) The last, Layer together
sleeve and main part. 32) The last, Layer together
sleeve and main part. Layer center of sleeve , margin of bottom of sleeve and margin of arm together and adjusting gather, place with marking pin. For beginners, do baste well and take out all marking pin and sew with machine. |
| 34)You can attach a button to the sleeve
for your preference. If you do not understand how to use of the function of the buttonhole of the sewing machine, there is also the method fixing with a snap button to display a button. |
|
Size
|
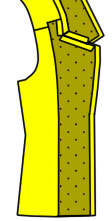
This is a pattern for tailor collar
jacket for women who want to be dressed like a man.This
pattern already has base for sew base. the way you are
not going to mistake and finished up making smaller. Also pattern has illustration of which parts, it is really easy to make. You can make those costume below the list. SOUL EATER D.Gray-man The Prince of Tennis PAPUWA HETALIA DEATH NOTE REBORN! The Melancholy of Haruhi Suzumiya Ouran High School Host Club |
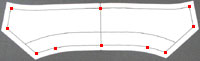
| Explanation on the
pattern. adjusting position of sewing together. make a hall on the conner. |
Home > How to sewing tutorial.
Copyright 2001 USAKO(usako). All
rights reserved. Never reproduce or republicate without written
permission.
No reproduction or republication without written permission.
Home(Japanese) | Home | Introduction | Paper pattern download. | How to Sewing video.
Copyright 2001 usako(USAKO). All rights reserved. Never reproduce or republicate without written permission.

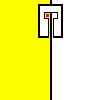
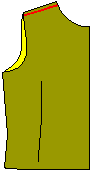
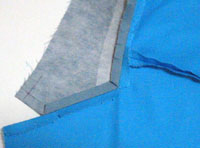
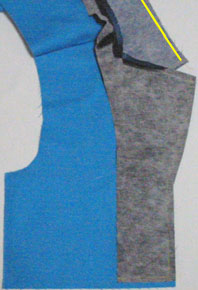
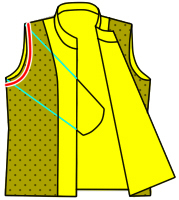
 front side.
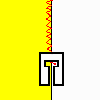
  reverse side.
  facing material.